Sephora.com, Inc.
Showing posts with label Maybelline. Show all posts

Wednesday, January 6, 2016

Review + Swatches: Sigma Synthetic Eye Brushes for Cream Products

Maybelline Barely Branded vs Benefit Bikini Tini Swatch

Sigma Cream Synthetic Eyeshadow Brushes Review

Sigma's synthetic eye brushes stand out from their competition because they come in a wide range of sizes and shapes. You're bound to find one that's perfect for you. The ones mentioned in this post are all made of synthetic material and animal cruelty-free. I love using them to work with cream eyeshadows and concealer because they glide product onto the skin smoothly and evenly.


Thursday, January 24, 2013

Review + Swatches: Maybelline Color Tattoo Metal 24HR Cream Gel Eyeshadow


Please check out my previous posts for swatches + reviews
The "pros and cons" refers only to Barely Branded, Inked In Pink and Gold Rush.

Pros:
  • texture feels creamy
  • applies smoothly (Barely Branded and Inked In Pink)
  • good color payoff (Barely Branded and Inked In Pink)
  • blends easily
  • doesn't crease or fade (Barely Branded and Inked In Pink)
  • lasts at least 16 hours (Barely Branded and Inked In Pink)
  • no fallouts during blending (Barely Branded and Inked In Pink)
  • doesn't tug the skin during application
  • no chunky glitter (Barely Branded and Inked In Pink)
  • affordable price

Cons:
  • contain tiny specks of sparkles (Gold Rush)
  • applies patchy (Gold Rush)
  • fallouts during blending (Gold Rush)
  • flakes away (Gold Rush)

Application: Here are the following steps that I take when I use them as a base for powder eyeshadows and to ensure a perfect application:
  1. apply product on left eye for a sheer wash of color (using a synthetic brush)
  2. apply product on right eye for a sheer wash of color (using a synthetic brush)
  3. apply 2nd layer on left eye for an opaque finish
  4. apply 2nd layer on right eye for an opaque finish
  5. blend left eye
  6. blend right eye

It's not rocket science, but I find that when I blend immediately after applying, the product fades away and if I wait too long, it becomes really difficult to blend. So, just follow those 6 simple steps that I mentioned above and blending will be a breeze. (Note: Do not over apply them or they will "cake and crack.") Also, I recommend using a synthetic brush, such as the Royal & Langnickel BC411 brush (mini review), because it's more sanitary, it offers more control and it gives better color payoff.

As for lasting power, I don't dare to test these eyeshadows for 24 hours because (1) makeup should not be worn for that long and (2) I don't want to get an eye infection or irritated skin. However, I did test Barely Branded and Inked In Pink on my oily lids for 16 hours and they didn't fade or crease when used with a primer, without a primer or with powder eyeshadows over them.

Gold Rush was a bit of a disappointment. It applies unevenly and makes a mess during blending because it contains tiny specks of sparkles. I've tried wearing a primer underneath and using my fingers, a concealer brush, and many other synthetic brushes, but it made no difference. It still left a patchy and glittery finish when applied sheerly. When I layered it, it left a dry, cakey and scaly finish. Also, the product flakes off within minutes of application. The pigmentation looks fine in my arm swatches. Unfortunately, it just doesn't translate that way when applied onto my lids.


70 Barely Branded is a light champagne-beige shade with a metallic finish. When worn on my lids and compared side by side, Barely Branded pulls more yellowy beige-gold, while Barely Beige pulls more pink. When swatched on my hand near natural lighting, they both look indistinguishable. I also couldn't tell the difference between the two when I wore MAC Jest on top.

I love both shades equally because they're both so easy to wear and they prevent my eye makeup from creasing and fading, even in the corner of my eye! These are perfect for creating an everyday neutral eye look and have been a staple in my makeup collection. I can't live without them and have multiple backups of each! (Note: They can be a little bit tricky to work with because if I apply a sheer layer and then set it with a powder eyeshadow, I experience a little bit of fading throughout the day. If I over apply it, it looks dry, scaly and cakey. I find that applying 2 layers of it and then setting it with a powder eyeshadow is the best way to use it.)

55 Inked In Pink is a light rosy pink with a metallic finish. When swatched on my arm, it looks too dark to be a lid shade. However, when worn on my lids, it looks lighter and more like a light neutral pink shade. It looks absolutely gorgeous as an all over the lid color and excellent as a base for powder eyeshadows, such as MAC Jest. My swatches don't do the colors any justice. (I promise it's really not that dark when applied on the lids! It's actually one of my go-to shades when I want to create an everyday neutral eye look.)

(Picture above was taken inside near a window. All pictures below were taken outside.)


65 Gold Rush is a bright yellow gold with a metallic finish and tiny specks of sparkles. The color doesn't suit my NC30/35 skin tone that well. Also, when worn alone, it leaves a very patchy finish. When I applied Urban Decay Half Baked over it, it looked slightly orange, which baffled me because when I wear Half Baked alone, it does not look orange on my medium complexion at all.

Bold Gold and Gold Shimmer are more brown and work well as a base to make warm eyeshadows appear less orangey on lighter beauties. If you found MAC Woodwinked or Urban Decay Half Baked to be too orange on your skin tone, then I recommend wearing Bold Gold or Gold Shimmer underneath.


Bottom Line: Gold Rush definitely doesn't look attractive when worn alone and is a pain to work with due to its tiny specks of sparkles. However, Barely Branded and Inked In Pink are amazing in every aspect and I highly recommend hoarding a bunch. They have (1) excellent pigmentation, (2) are easy to apply, (3) they intensify the color of powder eyeshadows, (4) lengthen the wear of my eye makeup and (5) are super affordable.

Note: The Maybelline Color Tattoo Metal 24HR Cream Gel eyeshadows in Barely Branded, Inked In Pink, Bold Gold and Gold Rush are permanent. Barely Beige and Gold Shimmer are limited edition. Each contains 4g of product and is available at UltaTarget and drugstore.com for around $6. As with any drugstore product, I would definitely wait for a sale because there is always a "buy one, get one half off" or even a "buy one, get one for free" sale.

Which Maybelline cream shadows are your favorite?
original permanent shades (review & swatches)
limited edition shades (review & swatches)


*This post contains affiliate links. None of the products mentioned are sponsored.

Saturday, September 29, 2012

Review + Swatches: Maybelline Color Tattoo 24HR Cream Gel Eyeshadows (Limited Edition)

Top Row From Left to Right: 200 Mossy Green ~ 300 Gold Shimmer ~ 400 Rich Mahagony
Bottom Row From Left to Right: 200 Ready Set Green ~ 300 Fuchsia Fever

Hey Beauties! I hope everyone is doing well. I miss you all so, so much! Sorry for the lack of posts, but I recently gone back to school to pursue my MBA and things have been pretty hectic around here. Even if I don't have time to post full, detailed reviews, I promise to get swatches posted as quickly as I can. =)

Anyways, let's get onto the review and swatches of the 
Maybelline Limited Edition Color Tattoo Cream Eyeshadows.

Application: I find that these new limited edition shades are creamier and apply smoother than the permanent shades (review & swatches). I prefer to use a synthetic brush because it's more sanitary, it gives me better control and I get better color payoff. (I don't recommend using a brush with natural bristles to apply the cream eyeshadows because they will apply very patchy. Also, do not over apply them or they will "cake and crack.")

Here are the following steps that I take when I use them as a base for powder eyeshadows and to ensure a perfect application:

  1. apply product on left eye for a sheer wash of color (using a synthetic brush)
  2. apply product on right eye for a sheer wash of color (using a synthetic brush)
  3. apply 2nd layer on left eye for an opaque finish
  4. apply 2nd layer on right eye for an opaque finish
  5. blend left eye
  6. blend right eye
It's not rocket science, but I find that when I blend immediately after applying, the product fades away and if I wait too long, it becomes really difficult to blend. So, just follow those 6 simple steps that I mentioned above and blending will be a breeze. Also, I did not experience any fallouts, which was an issue for me with the permanent shades (Too Cool, Bold Gold, Pomegranate Punk & Audacious Asphalt).

As for lasting power, I don't dare to test these eyeshadows for 24 hours because (1) makeup should not be worn for that long and (2) I don't want to get an eye infection or irritated skin. However, I did test them on my oily lids for 16 hours and they didn't fade or crease when used with a primer, without a primer or with powder eyeshadows over them.


From Left to Right: 300 Gold Shimmer ~ 400 Rich Mahagony ~ 200 Mossy Green

300 Gold Shimmer is a shimmery bronzey gold shade. I find it too dirty looking and too "cool" for my NC35/37 skin tone when worn alone. However, I like setting it with a green or gold powder eyeshadow. Also, if you found MAC Woodwinked or Urban Decay Half Baked to be too orange on your skin tone, then I recommend using Gold Shimmer as a base because it makes both eyeshadows appear less warm. 

400 Rich Mahagony is a shimmery deep brown shade with burgundy shimmers. This can be be used to intensify the color of brown eyeshadows or to change a matte eyeshadow, such as MAC Soft Brown, into a shimmery finish.

200 Mossy Green is a shimmery olive green with gold shimmers. When worn as a base for green (MAC Humid) and gold eyeshadows (Urban Decay Half Baked), the gold and olive undertones really show through, respectively. This is a great shade for the fall season!

From Left to Right: 200 Ready Set Green ~ 300 Fuchsia Fever

200 Ready Set Green is a shimmery jade green shade. It works well as a base for gold and greens eyeshadows. However, I personally prefer Mossy Green because it compliments my warm skin tone better and I love that it has a gold undertone to it. Those with a cooler complexion may favor Ready Set Green more. 

300 Fuchsia Fever is a shimmery pinkish purple shade. I absolutely love using it as a base for purple (Stars Makeup Haven Plum Crazy) and burgundy (Stars Makeup Haven Taz or MAC Cranberry) eyeshadows. Fuchsia Fever is definitely one of my favorites of the bunch.


From Left to Right: 100 Barely Beige ~ 05 Too Cool

100 Barely Beige is a shimmery pinky beige shade. I always had a hard time getting light neutral eyeshadows (MAC Jest) to stay put on my oily lids. I've tried many different primers, but light colored eyeshadows always fade away in the inner corner of my eye within 8 hours. I'm so glad I found Barely Beige because it's not as stark white as Too Cool and it prevents creasing and fading, even in the corner of my eye! This has become one of my holy grails and I highly, highly recommend it because it's a staple for creating everyday neutral eye looks. (It is a little bit tricky to work with because if I apply a sheer layer and then set it with a powder eyeshadow, I experience a little bit of fading throughout the day. If I over apply it, it looks dry, scaly and cakey. I found that applying 2 layers of it and then setting it with a powder eyeshadow is the best way to use it.)

By the way, Barely beige was a b!tch to find. Please excuse my language, but I had to go to at least 10 different stores to track this sucker down. I finally found it at a drugstore called Duane Reade. There were only 2 left. So, I bought one for me and I'm saving the other one for my next giveaway because I know alot of you beauties out there couldn't find it. =( Why is this limited edition?!


Bottom Line:  I highly recommend stocking up while you still can because the Maybelline Color Tattoos are super versatile and the quality is amazing, especially for the price. They are excellent as a base for intensifying the color of powder eyeshadows and they also prevent creasing & fading. Also, they can be worn alone as well. I just wish they weren't limited edition.

Note: The Maybelline Color Tattoo 24HR Cream Gel eyeshadows in Mossy Green, Gold Shimmer, Rich Mahagony, Ready Set Green, Fuchsia Fever and Barely Beige are all limited edition. Each contains 4g of product and is available at UltaTarget and drugstore.com for around $7. As with any drugstore product, I would definitely wait for a sale because there is always a "buy one, get one half off" or even a "buy one, get one for free" sale.

*This post contains affiliate links. None of the products mentioned are sponsored.

Were you able to find any of the limited edition shades?


Saturday, June 16, 2012

OOTD + Maybelline Colossal Waterproof Mascara (Before + After Photos)


I usually don't do Outfit of the Day (OOTD) posts because by the time I get home, 
the sun is already down and my bedroom lighting is horrendous. 
However, due to popular requests, I decided to post one up for you all. =)

Dress: 35.95 at Zara 
(I bought this at a Zara store in Greece. I didn't see it in stock at any Zara store in the US.)
Belt: $8 at Wet Seal
Shoes by Nine West: $39.99 at Marshalls

Burberry Check Satchel pictured for size reference, only

I also received several emails requesting me to post a picture of me wearing 
the Burberry Check Satchel for size reference. 
I am 5'5" with heels and vertically challenged 5'2" when barefoot.

(I received the Burberry handbag a few years ago as a birthday gift. 
Everything else was purchased with my own funds.)


Please excuse the lighting. The picture was taken in the bathroom. So, the colors are not accurately portrayed. 
However, the result of the mascara is accurately portrayed.
Left: bare naked lashes
Right: with 2 coats of mascara


My makeup never looks complete without mascara because I have non-existent short and thin lashes. I have tried over 20 mascaras from various brands and the Maybelline Volum' Express Colossal Waterproof Mascara in Classic Black is one of the better ones that I have tried. 

The wand is not flimsy, which I like because the firmness allows for better control and the bristles are so dense that they easily coat all my lashes. I find that it lengthens and volumizes better than the Maybelline Falsies and L'oreal Voluminous Million Lashes mascara. The formula is also slightly wetter, which I prefer because it's easier to build up the mascara. Also, it holds my curl and doesn't clump or smudge throughout the day. However, after 2 and a half months of opening, it started to clump my lashes. I tried to remedy the situation by separating my lashes with my Royal & Langnickel BC515 metal comb, but the mascara would flake throughout the day. So, I had no choice, but to stop using it after only 2 and half months of opening. Generally, mascaras should be tossed out after 3 months of opening; however, I've used some mascaras longer than the expiration date and I didn't experience any eye infection or anything negative. So, I just wish the Maybelline Colossal mascara would last a little bit longer, but I really don't mind because it's so affordable.

Note: The Maybelline Volum' Express Colossal Waterproof Mascara in Classic Black is available at Ulta, Target, and drugstore.com for around $6.99. 

*This post contains affiliate links.

Have you tried the Maybelline Colossal mascara?

Tuesday, March 13, 2012

Review + Swatches: Maybelline Color Tattoo 24HR Cream Gel Eyeshadow

Top Left to Right: 05 Too Cool, 45 Bold Gold, 35 Tough as Taupe
Bottom Left to Right: 25 Bad to the Bronze, 30 Pomegranate Punk, 15 Audacious Asphalt

The Maybelline Color Tattoo 24HR Cream Gel eyeshadows* have received quite a lot of attention in the blogging sphere, but I was hesitant on testing them because I have oily lids. I'm so glad that I tried these because they definitely changed my mind about drugstore products. Budget beauty brands have come a long way and now offer better quality, while still maintaining a friendly price. =)

Top Left to Right: 05 Too Cool, 45 Bold Gold, 35 Tough as Taupe
Bottom Left to Right: 25 Bad to the Bronze, 30 Pomegranate Punk, 15 Audacious Asphalt

Pros:
  • texture feels creamy
  • blends easily
  • good color payoff
  • doesn't crease or fade
  • lasts at least 16 hours
  • no fallouts during blending (matte shade)
  • applies smoothly and doesn't tug the skin during application
  • no chunky glitter
  • affordable price

Cons:
  • minor fallouts during blending (Too Cool, Bold Gold, Pomegranate Punk & Audacious Asphalt)
  • Too Cool, Bold Gold, Pomegranate Punk & Audacious Asphalt contain tiny specks of sparkles

Left to Right: 05 Too Cool, 45 Bold Gold, 35 Tough as Taupe


Too Cool is a shimmery bright white shade with tiny specks of sparkles.

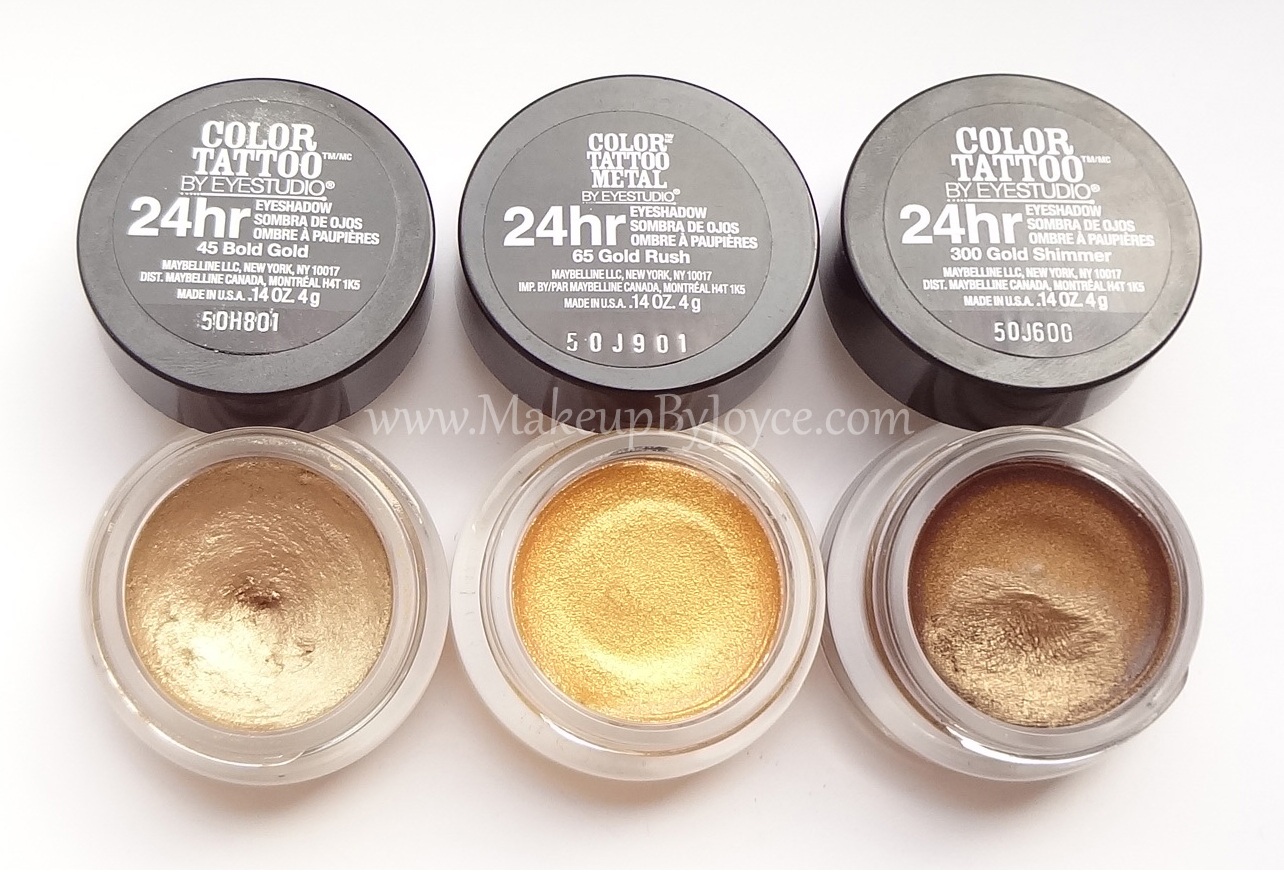
Bold Gold is a shimmery antique gold shade with tiny specks of sparkles. The color is too yellow and dirty looking for my NC30/35 skin tone. However, if you found MAC Woodwinked or Urban Decay Half Baked to be too orange on your skin tone, then I recommend using Bold Gold as a base because it makes both colors appear less warm.

Tough as Taupe is a mauvey grey shade with a matte finish.

Left to Right: 25 Bad to the Bronze, 30 Pomegranate Punk, 15 Audacious Asphalt


Bad to the Bronze has a shimmery taupey sheen with a bronze base shade. This is my favorite shade of the bunch because it compliments my skin tone very well when worn alone or as a base for powder eyeshadows. Also, it's perfect for an "everyday, neutral eye look."

Pomegranate Punk is a shimmery burgundy shade with tiny specks of sparkles.

Audacious Asphalt is a shimmery silver grey shade that leans a little blue on my NC30/35 skin tone. It also has tiny specks of sparkles.


Packaging: Each eyeshadow is sealed with a plastic wrapper and is packaged in a glass jar, which is sturdy and not cheap-looking at all, even though the black screw-top lids are made of plastic. The jars are transparent and give a clear view of the product inside, which makes them distinctive from one another when you store them upside down. (Also, when you store them upside down, the moisture settles towards the surface. So, the product doesn't dry out as quickly.) The only "mistake" that Maybelline did was labeling the name of the shades on the lid instead of the bottom of the jar, which could cause the lids to be mismatched, especially if you bought all 10 shades. However, it was very easy to guess the color and it didn't take me long to figure out which lid goes where.


Application: None of these eyeshadows tug the skin during application; however, the matte shade applies the smoothest, regardless of the type of tool that is used. The shimmery shades apply less smooth when used with a synthetic brush, such as the Royal & Langnickel BC411 brush (mini review). I find that they apply more smoothly and evenly when used with a finger, but the pigmentation is not as intense as when used with a brush. I still prefer to use a synthetic brush because it's more sanitary, it gives me better control and I get better color payoff. (I don't recommend using a brush with natural bristles to apply the cream eyeshadows because they will apply very patchy. Also, do not over apply them or they will "cake and crack.")

These eyeshadows give me ample time to blend before they completely dry and set. Here are the following steps that I take to ensure a perfect application:
  1. apply product on left eye (using a synthetic brush)
  2. apply product on right eye (using a synthetic brush)
  3. blend left eye
  4. blend right eye
It's not rocket science, but I find that when I blend immediately after applying, the product fades away and if I wait too long, it becomes really difficult to blend. So, just follow those 4 simple steps that I mentioned above and blending will be a breeze. Unfortunately, there will be some minor fallouts when you start blending Too Cool, Bold Gold, Pomegranate Punk & Audacious Asphalt because they contain tiny specks of sparkles. However, the mess can be easily wiped away if you apply your eye makeup before your foundation. .

As for lasting power, I don't dare to test these eyeshadows for 24 hours because it may irritate my skin. However, I did test them on my oily lids for 16 hours and they didn't fade or crease when used with a primer, without a primer or with powder eyeshadows over them.


Bottom Line: Too Cool, Bold Gold, Pomegranate Punk & Audacious Asphalt have tiny specks of sparkles; however, I don't mind them because they are not gritty, chunky glitters. Although they may not be appropriate for the office, I would still wear them at the club, mall, or even at the park. I highly recommend checking them out, especially if you plan on using them as a base because they intensify the color of powder eyeshadows and the lasting power is amazing. Hopefully, Maybelline has plans to expand their color range and will release some more neutral matte shades in the future.

Note: Each Maybelline Color Tattoo 24HR Cream Gel eyeshadow contains 4g of product and is available at UltaTarget and drugstore.com for around $6. 


Which Maybelline cream eyeshadow is your favorite?

*This post contains affiliate links. None of the products mentioned are sponsored.
 
Related Posts Plugin for WordPress, Blogger...